English
Hello community, a few months ago I was taking a drawing course to start uploading my drawings and the process of them to my YouTube channel. Ever since I decided to learn to draw, I always wanted to make a realistic eye, and I think the time had come for that and to share them with you, so I'll tell you more or less how I did it.
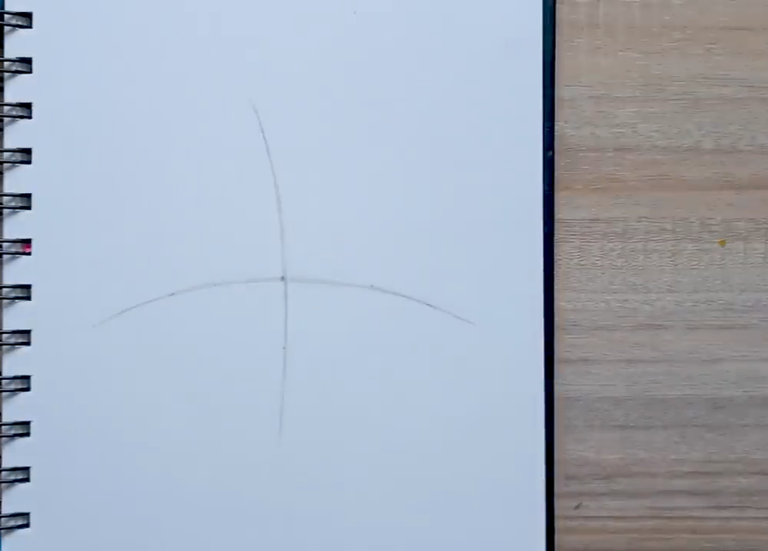
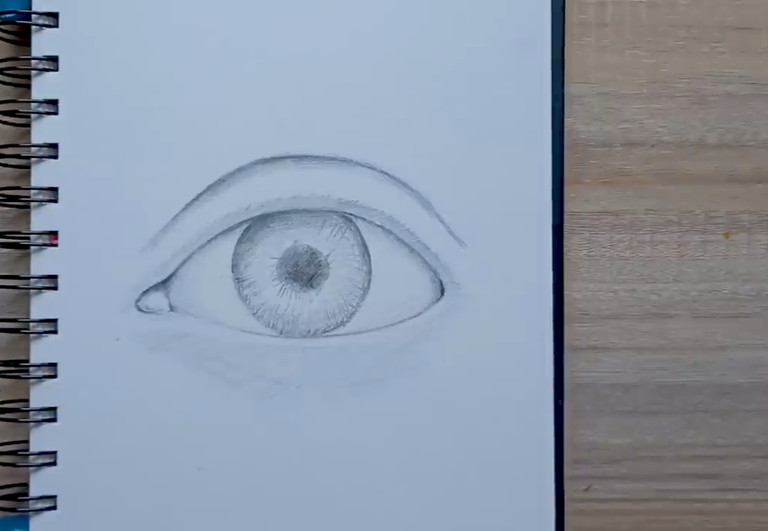
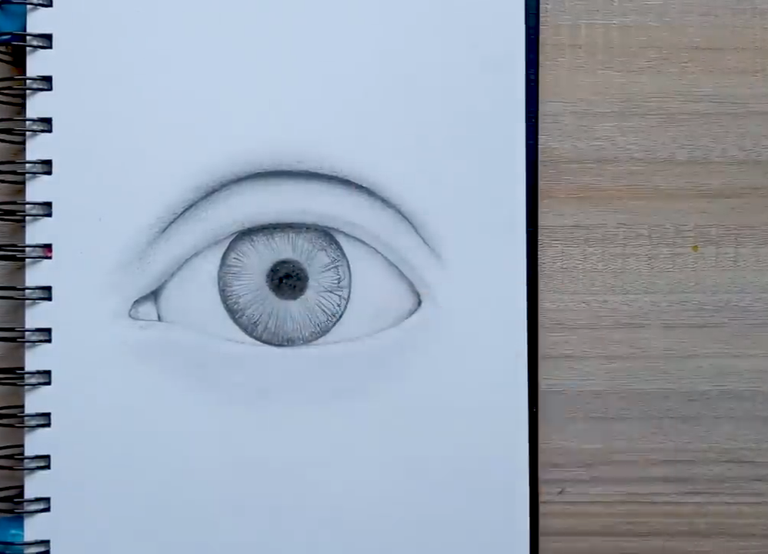
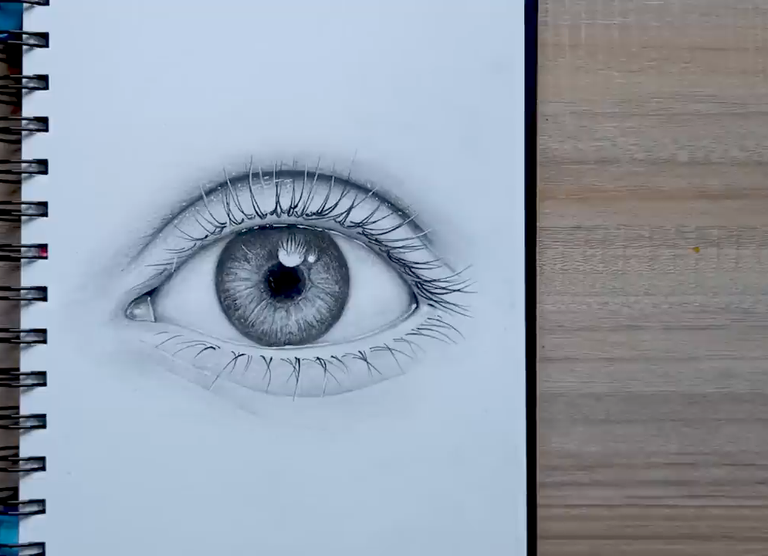
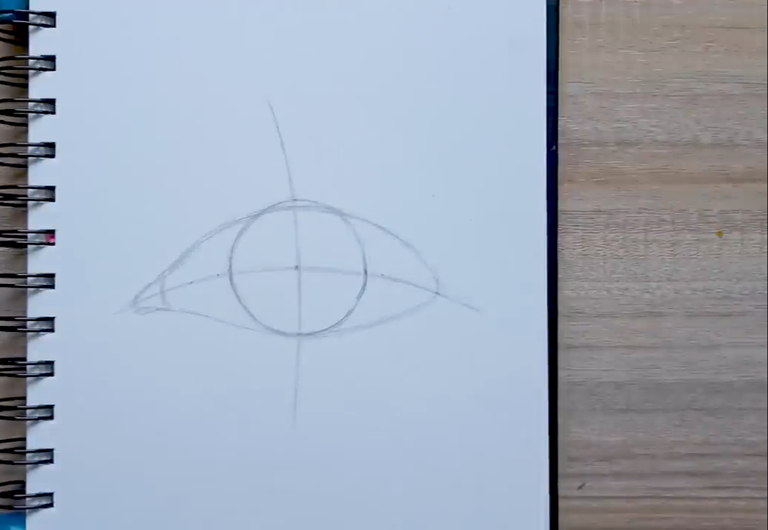
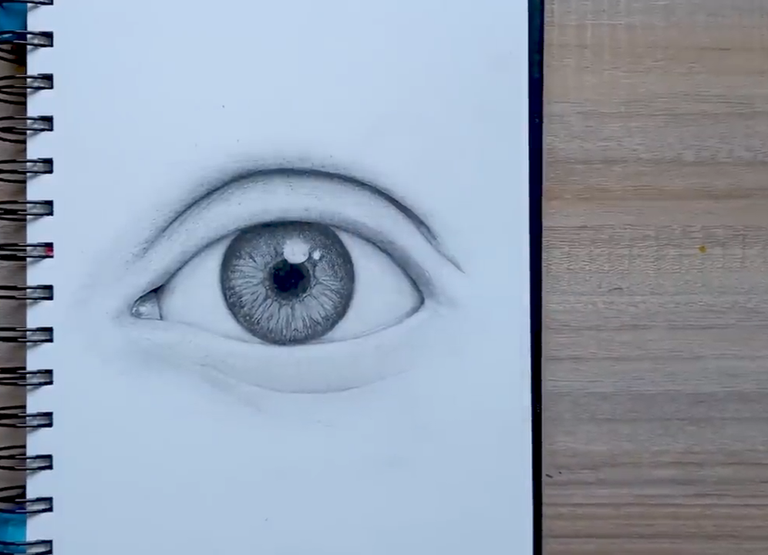
I start by drawing a horizontal line in the center of the sheet of paper followed by a vertical curve that crosses it. I visualize a circle that will form right at the intersection of both lines. I draw the shape of the eye, starting with the tear duct and creating a curve that defines the upper eyelid. The lower part of the eye also takes shape, connecting both sides with a soft curve. I make sure the top line doesn't touch the circle but stays a little below it, which gives it a more natural look. Then I add the eyelid crease and some subtle wrinkles under the eye, which gives more character to the drawing. Once I like how the sketch turned out, I erase the guide lines and begin shading. I use a regular pencil, applying light pressure at first to create shadows. soft on the tear duct the crease and the sclera, I move the pencil diagonally which helps the shadows look more uniform, for the iris I draw lines from the edges towards the pupil repeating the process until the eye begins to come alive, to blend the shadows I use a cotton swab moving it in circles over the shaded areas, this softens the lines and gives them a more realistic finish, I also try using a piece of toilet paper which proves effective for larger areas however I learn to be careful not to use the same stained piece as that will cause parts that I do not want to stand out, to give the eye brightness I use the edge of an eraser intensifying the highlights on the sclera then I draw the eyelashes making sure they have a natural curve, the upper lashes are thicker and fuller than the lower ones which gives a touch of realism, and finally I added the small flashes of moisture in the eye which are essential to make it look alive. With each stroke and shadow, I create a realistic eye that reflects my effort and dedication.
Process


I hope you like the result of the drawing. I really worked hard to make it. In the video I left you, you'll see it in time-lapse because I really put a lot of time into it. So, if you like it, please leave your opinions and tips.


Logo created at blog gif
English translation done with Google Translate.
Images are from my YouTube video.
.
YouTube Channel
.
.
.
.
.
.
.
.
.
.
Español
Hola comunidad hace unos meses estaba pasando un curso de dibujo para comenzar a subir mi dibujos y el proceso de los mismos a mi canal de Youtube y Desde que decidí aprender a dibujar siempre quise hacer un ojo realista y creo que ya había llegado el momento para eso y para compartirselos así que les cuento más o menos como fue que hice
Comienzo trazando una línea horizontal en el centro de la hoja seguida de una curva vertical que la cruza visualizo un círculo que se formará justo en la intersección de ambas líneas, dibujo la forma del ojo comenzando por el lagrimear y creando una curva que define el párpado superior, la parte inferior del ojo también toma forma, conectando ambos lados con una suave curva, me aseguro de que la línea superior no toque el círculo sino que se mantenga un poco por debajo, lo que le da un aspecto más natural, luego luego añado el pliegue del párpado y algunas arrugas sutiles debajo del ojo, lo que le da más carácter al dibujo, una vez que me gusta como quedó el boceto, borro las líneas guías y comienzo a sombrear, utilizo un lápiz común aplicando poca presión al principio para crear sombras suaves en el lagrimal el pliegue del párpado y la esclerotica, muevo el lápiz en diagonal lo que ayuda a que las sombras se vean más uniformes, para el iris dibujo líneas Desde los bordes hacia la pupila repitiendo el proceso hasta que el ojo comienza a cobrar vida, para difuminar las sombras utilizo un hisopo moviendo lo en círculos sobre las áreas sombreadas, esto suaviza las líneas y les da un acabado más realista, también pruebo con un trozo de papel higiénico que resulta ser efectivo para las áreas más grandes sin embargo aprendo a tener cuidado de no usar el mismo trozo manchado, ya que eso ocureve partes que no quiero resaltar, para dar el brillo al ojo utilizo el borde de un borrador intensificando los reflejos en la esclerotica luego dibujo las pestañas asegurándome de que tengan una curva natural, las pestañas superiores son más gruesas y abundantes que las inferiores lo que le da un toque de realismo, y finalmente añadí los pequeños destellos de humedad en el ojo que son escenciales para que se vea vivo. Así con cada trazo y sombra logro crear un ojo realista que refleja mi esfuerzo y dedicación
Proceso


Espero que les haiga gustado como quedó el resultado del dibujo, la verdad es que trabajé duro para hacerlo, en el vídeo que les dejé lo verán en cámara rápida porque la verdad le dedica tiempo, así que si les gusto dejen sus opiniones y consejos

Logo creado en blog gif
La traducción al inglés se realizó con Google Translate.
Las imágenes son de mi video de YouTube.