
Un saludo, mi gente maravillosa de @jewelry hoy vengo a participar en el concurso #335 de Splinterlands, para ello me inspire en un fan art y realice unos "zarcillos" de nuestra carta, inspirado en el personaje de nombre "Fungus Flinger" este fan art me ha inspirado para realizar estos hermosos zarcillos con la técnica de masa flexible o porcelana fría, me he inspirado en la figura de los hongos que este fanart posee.
Fungus Flinger, Por más encantadores que parezcan los insectos que lanzan hongos, son increíblemente letales si se los provoca. A menudo se los encuentra entre la hojarasca y la vegetación en descomposición de los humedales y los bosques, alimentándose de materia muerta o en descomposición. ▶️
Para este Fan Art utilice una técnica de porcelana al frío, para darle un toque especial, quise realizar los hongos en rojo con toques blancos, ne pareció interesante realizar estos hongos en otra versión ya que anteriormente los habia realizado en la técnica de peyote, una técnica sencilla y hermosa, ahora les invito a ponerse manos a la obra mis queridos creativos. Y ver este pequeño pasó a paso que tanto me gustó.

Greetings, my wonderful people of @jewelry today I come to participate in the contest #335 of Splinterlands, for this I was inspired by a fan art and make some “tendrils ” of our card, inspired by the character named “Fungus Flinger ” this fan art has inspired me to make these beautiful tendrils with the technique of flexible mass or cold porcelain, I was inspired by the figure of the mushrooms that this fanart has.
Fungus Flinger, As charming as fungus spewing insects may seem, they are incredibly lethal if provoked. They are often found among the leaf litter and decaying vegetation of wetlands and forests, feeding on dead or decaying matter. ▶️
For this Fan Art I used a cold porcelain technique, to give it a special touch, I wanted to make the mushrooms in red with white touches, I found it interesting to make these mushrooms in another version since I had previously made them in the peyote technique, a simple and beautiful technique, now I invite you to get down to work my dear creatives. And watch this little step by step that I liked so much.

Materiales:
✅️ Masa al frío Blanca y Roja
✅️ Pega Blanca
✅️ 2 Argollas pequeñas
✅️ 2 Pines de Zarcillos
✅️ Mandril pequeño
✅️ Estecas
✅️ Alambre #20
✅️ Pinzas de Bisuteria
Materials
✅️ White and Red cold dough
✅️ White glue
✅️ 2 small rings
✅️ 2 earwires pins
✅️ Small mandrel
✅️ Stamps
✅️ Wire #20
✅️ Fashion Jewelry Clamps
Paso a Paso / Step by Step

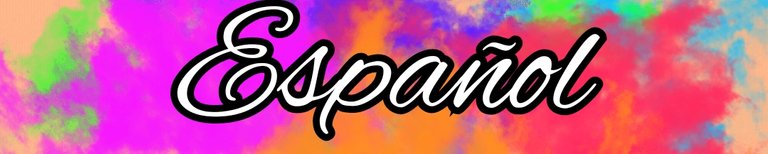
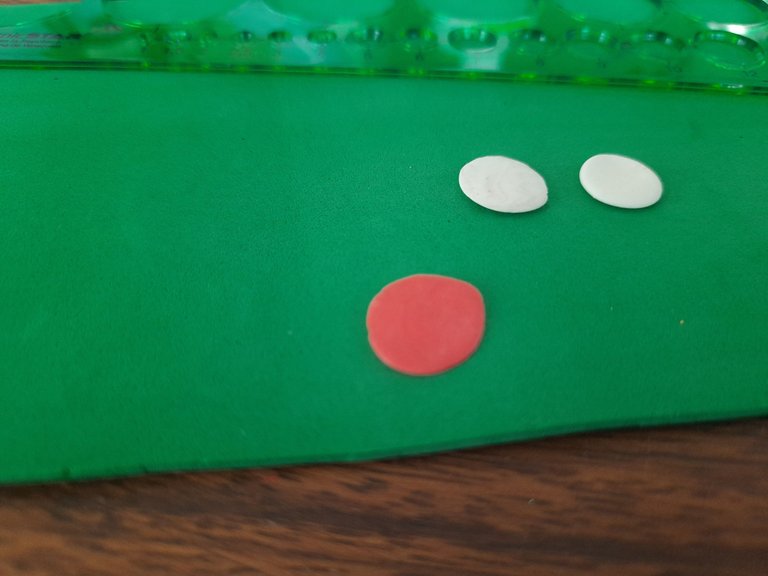
Como ya tengo las masas pintadas esta vez no las voy a pintar, sino que comenzamos tomando nuestra masa blanca y vamos a hacer dos bolitas de 6 cm cada una, para ella utilizaremos una regla medidora.
As I already have the doughs painted this time I am not going to paint them, but we start by taking our white dough and we will make two little balls of 6 cm each, we will use a measuring ruler for it.
 |  |
|---|
Después de tener listas nuestras bolitas vamos a aplanar con nuestros dedos dándole una forma circular.
After having our balls ready, we will flatten them with our fingers giving them a circular shape.
 |  |
|---|
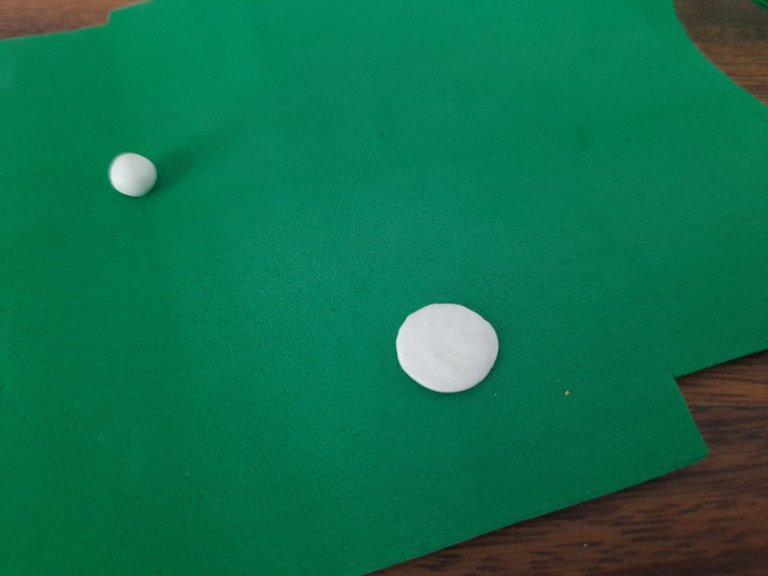
Haremos también dos bolitas de 7 cm de color rojo y también vamos a aplanarlas como lo hicimos con las blancas.
We will also make two 7 cm balls of red color and flatten them as we did with the white ones.
 |  |  |
|---|
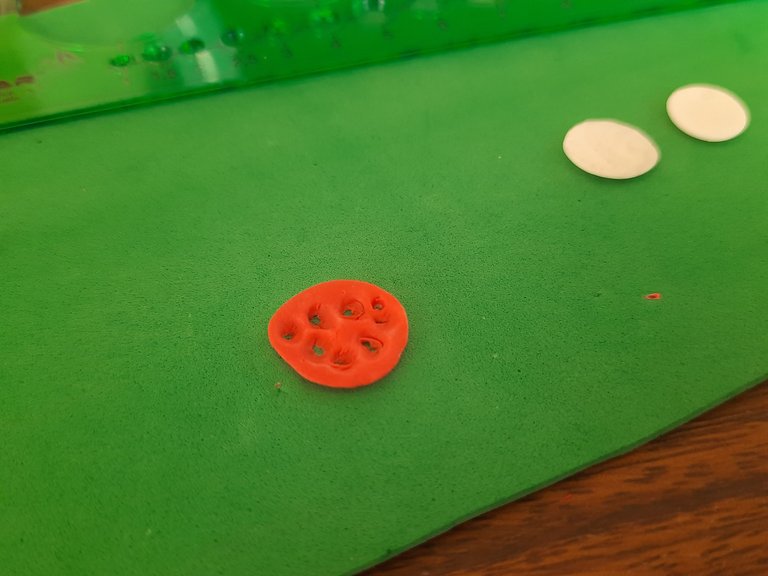
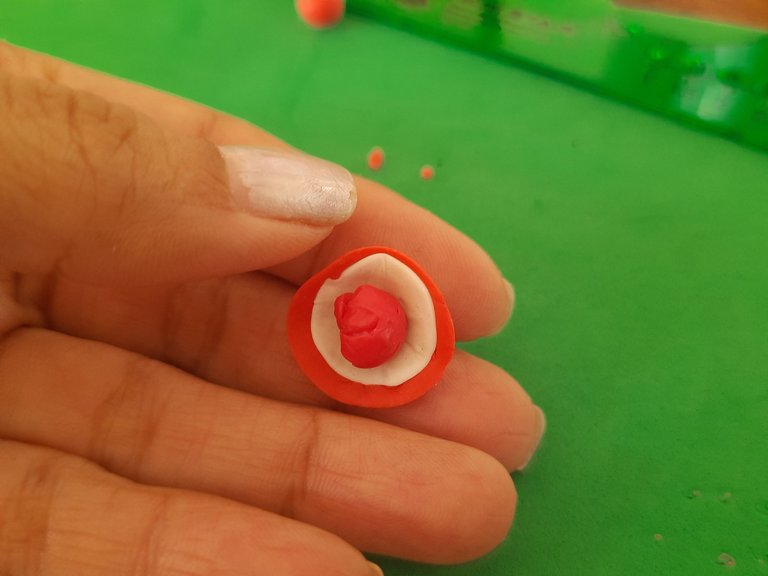
Después de aplanar nuestra bolitas Rojas, Vamos a abrirle unos pequeños círculos en la parte de arriba con nuestra estecas, para que se formar los pequeños círculos del hongo.
Luego pondremos la masa roja sobre la blanca y con nuestro pequeño mandril vamos a aplanar las dos de forma que ambas se unan.
After flattening our red balls, we are going to open some small circles on the top of them with our cutters, so that the small circles of the mushroom are formed.
Then we will put the red dough on top of the white dough and with our little mandrel we will flatten the two so that they join together.
 |  |  |
|---|
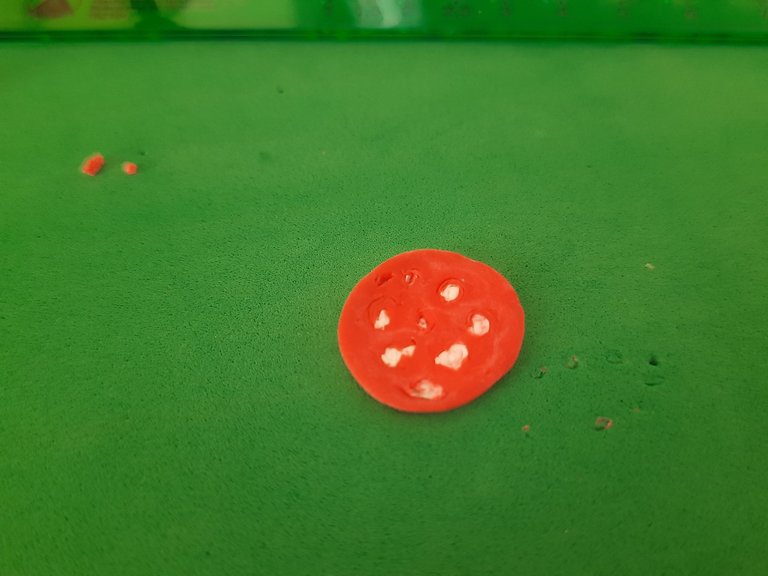
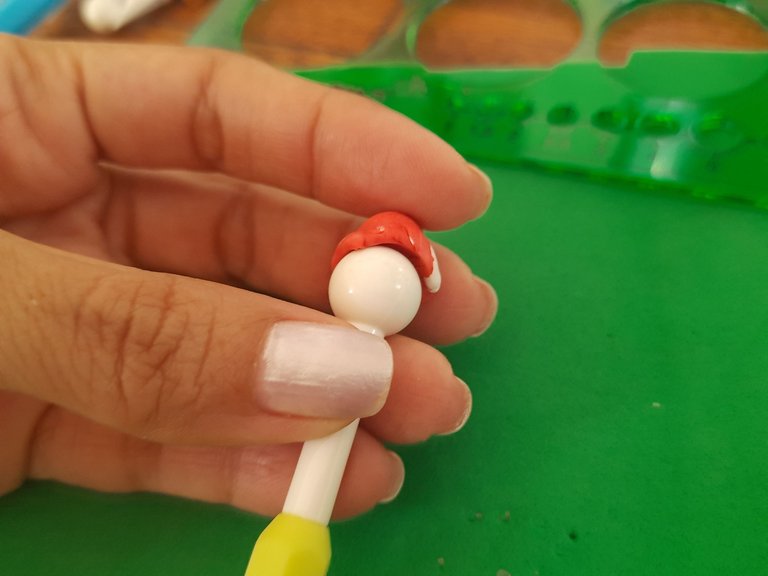
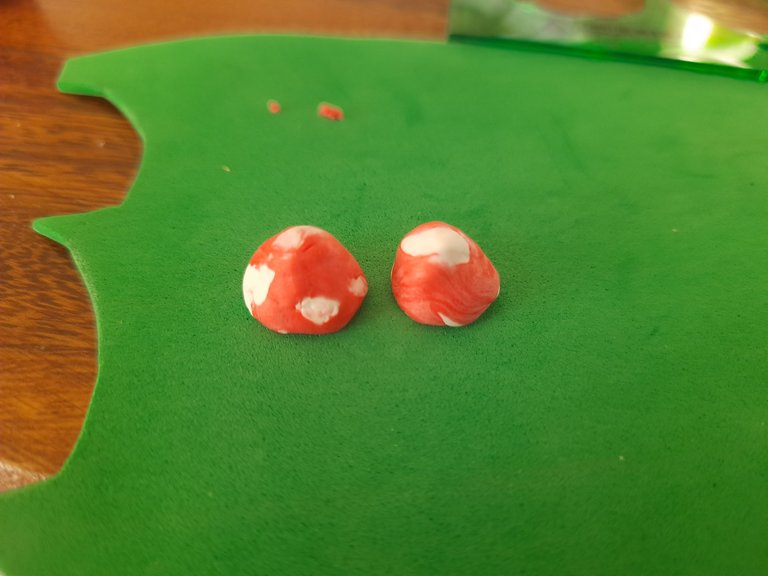
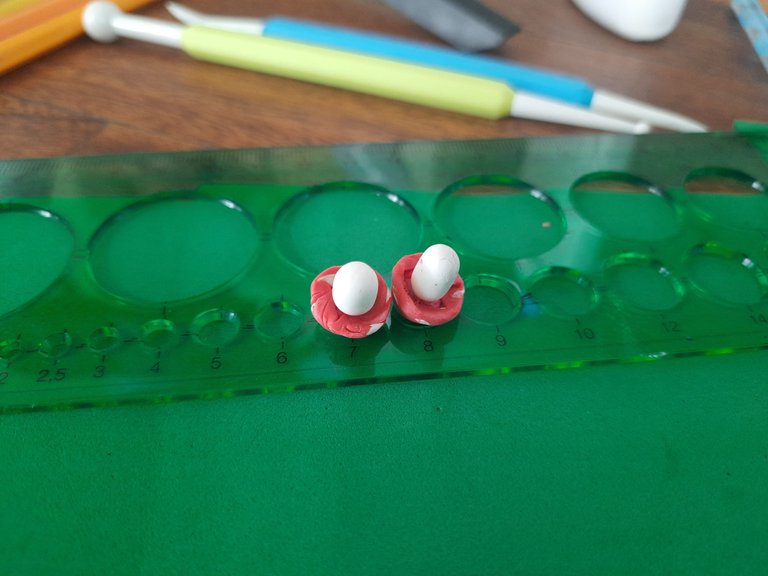
Ahora vamos a hacer una pequeña bolita como de 7 cm o 8 cm y vamos a introducirla en el medio de la forma que hemos estirado, y vamos a darle la forma de hongo aprovechando una esteca redonda para que le dé la forma de campana.
Now we are going to make a small ball of about 7 cm or 8 cm and we are going to introduce it in the middle of the form that we have stretched, and we are going to give it the shape of a mushroom taking advantage of a round peg to give it the shape of a bell.
 |  |  |
|---|
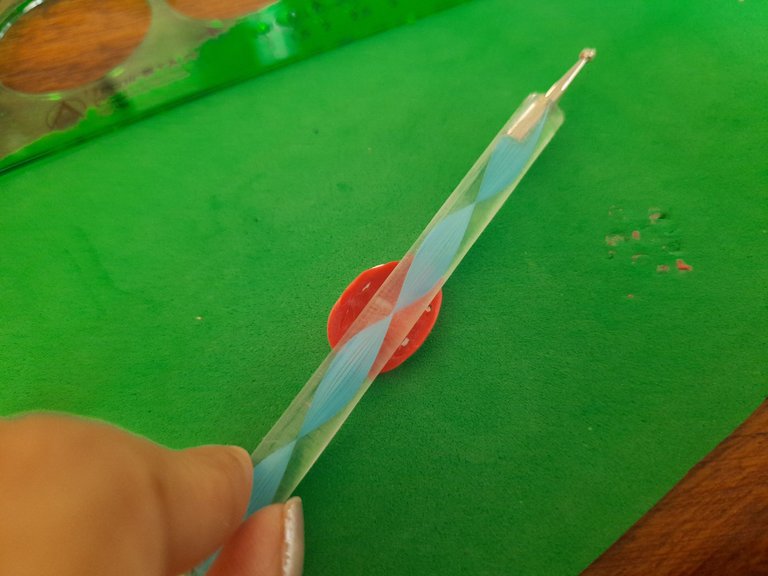
Ahora vamos con nuestras bolitas blancas de 7 centímetros, vamos a hacer un pequeño palito grueso de 0.9 centímetros de largo, y con pega Blanca lo vamos a pegar en la parte baja de nuestro hongo para así poner el tallo del mismo.
Now we are going to make a small thick stick of 0.9 centimeters long, and with white glue we are going to glue it on the lower part of our mushroom to put the stem of the mushroom.
 |  |  |
|---|
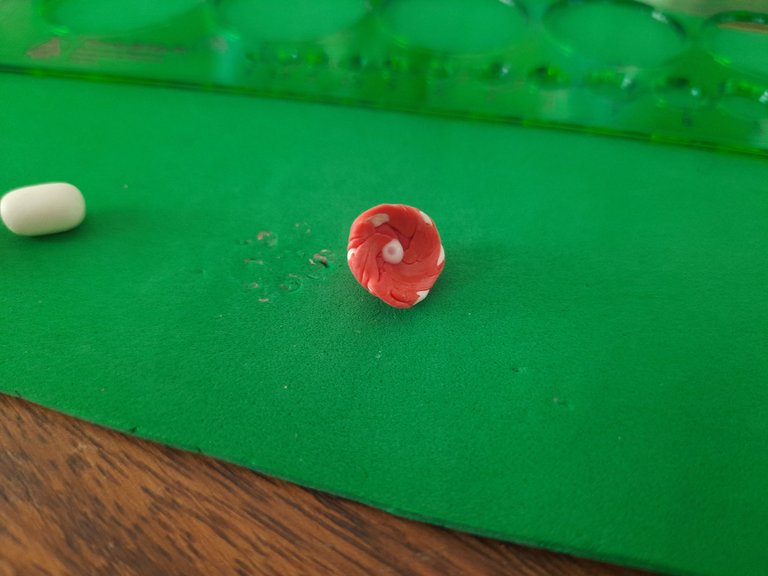
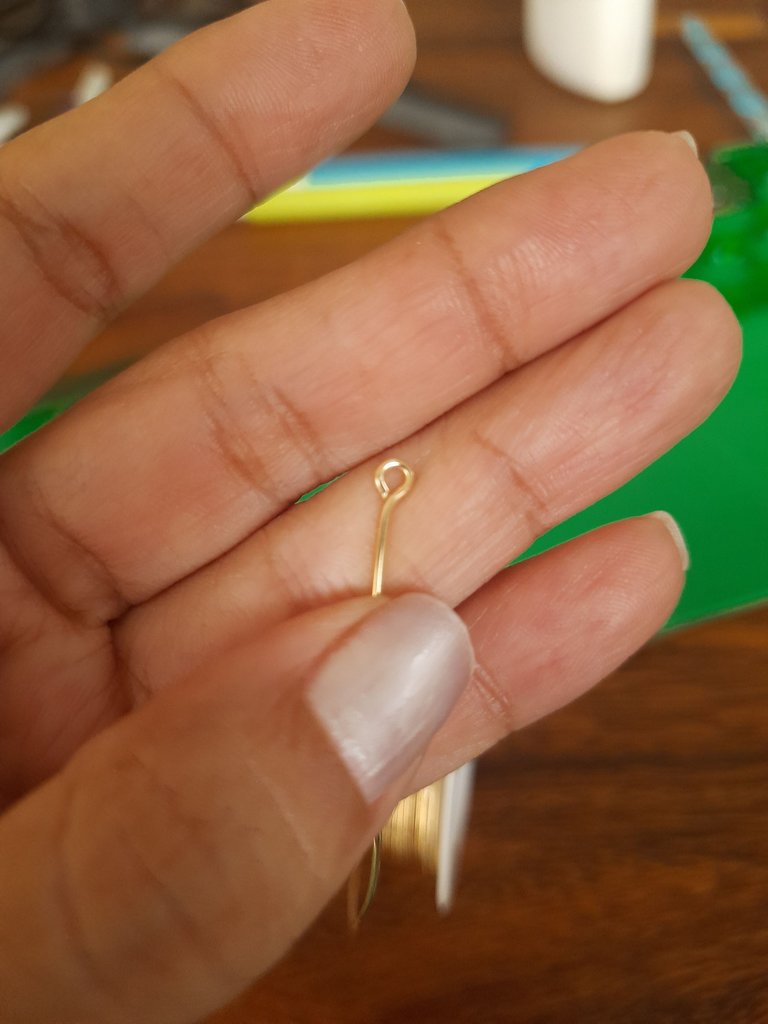
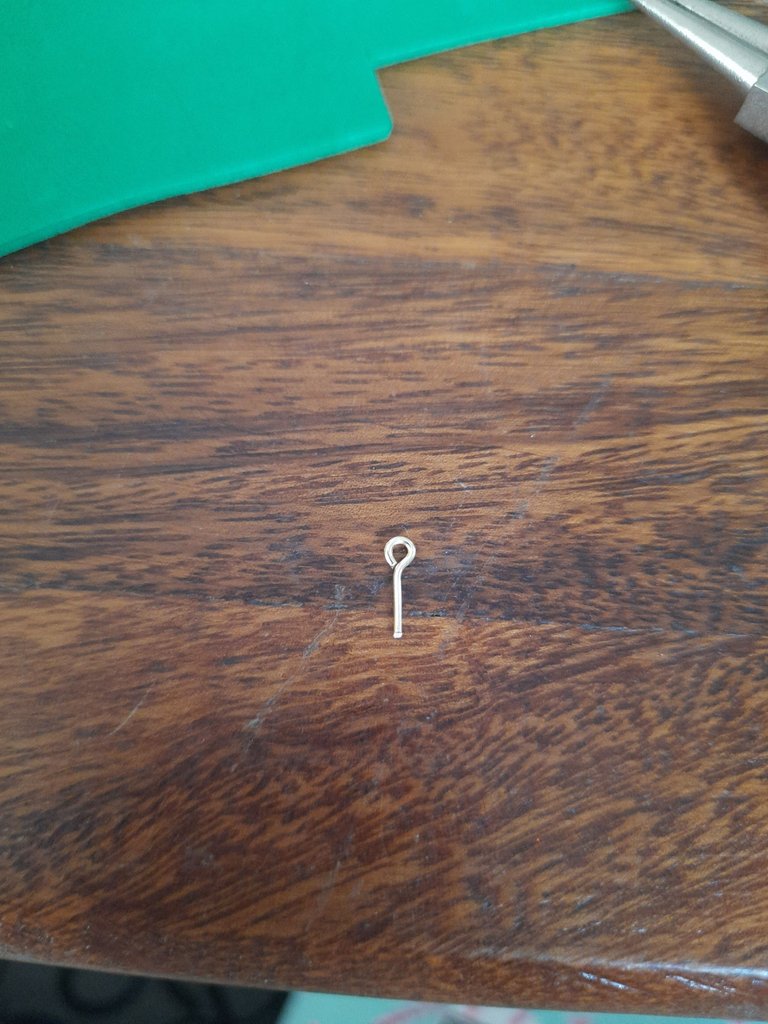
Por último vamos a hacer un pequeño pin de para guindar nuestra zarcillo, y colocarle luego una argolla, hacemos nuestra cabecita de alfiler, cortamos el alambre a un centímetro y con pega Blanca lo introducimos en la parte de arriba de nuestro hongo, colocamos el pin de zarcillo y hemos terminado nuestra creación.
Finally we are going to make a small pin to hang our tendril, and then place a ring, we make our little pin head, we cut the wire to one centimeter and with white glue we introduce it in the top of our mushroom, we place the tendril pin and we have finished our creation.
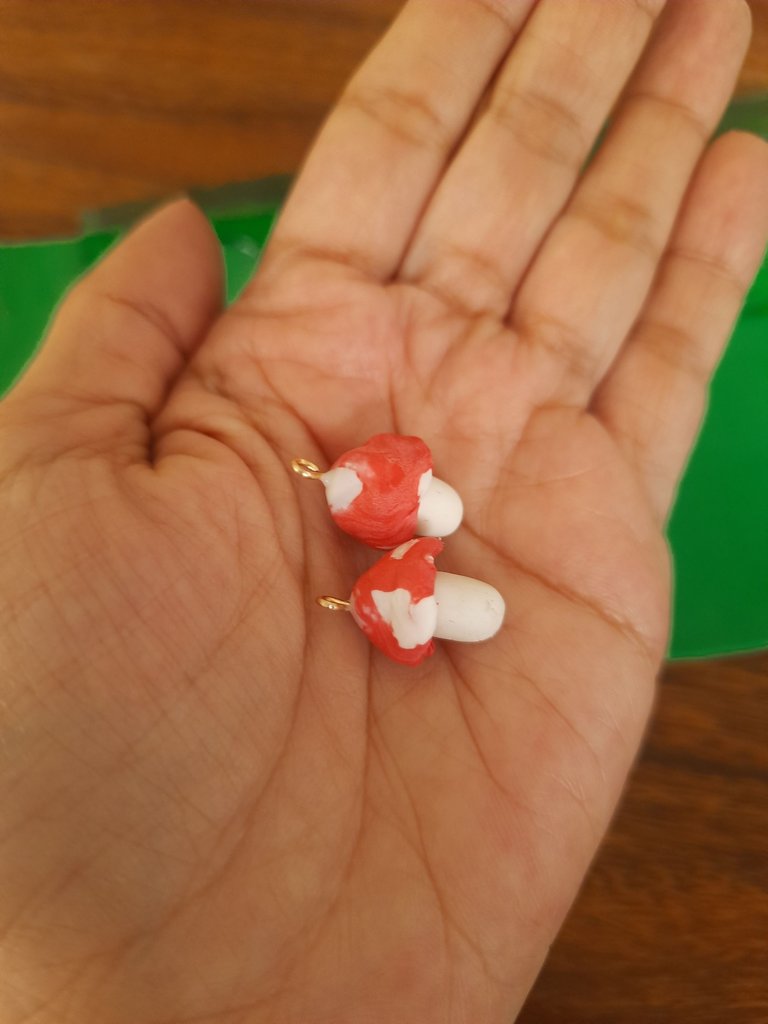
Resultado: / Result:
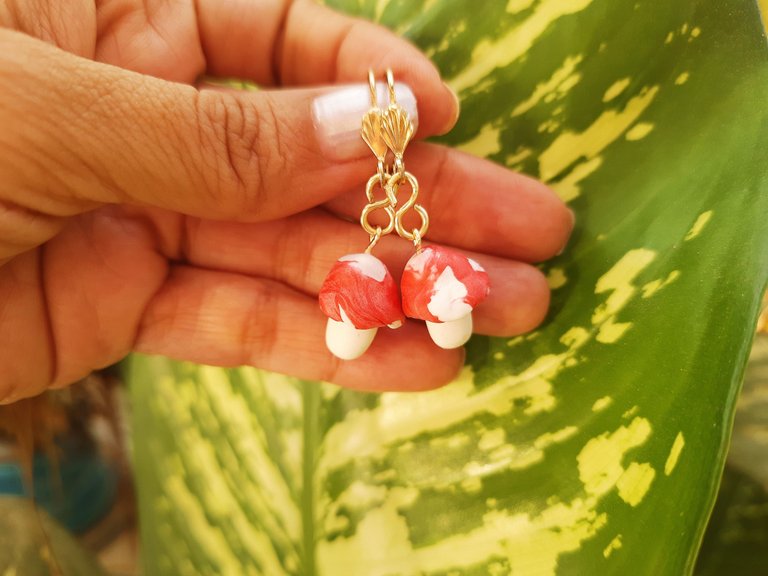
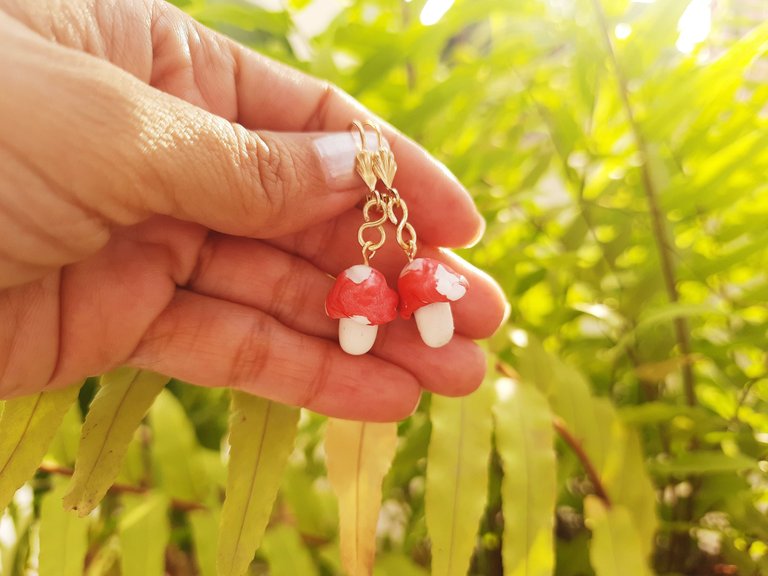
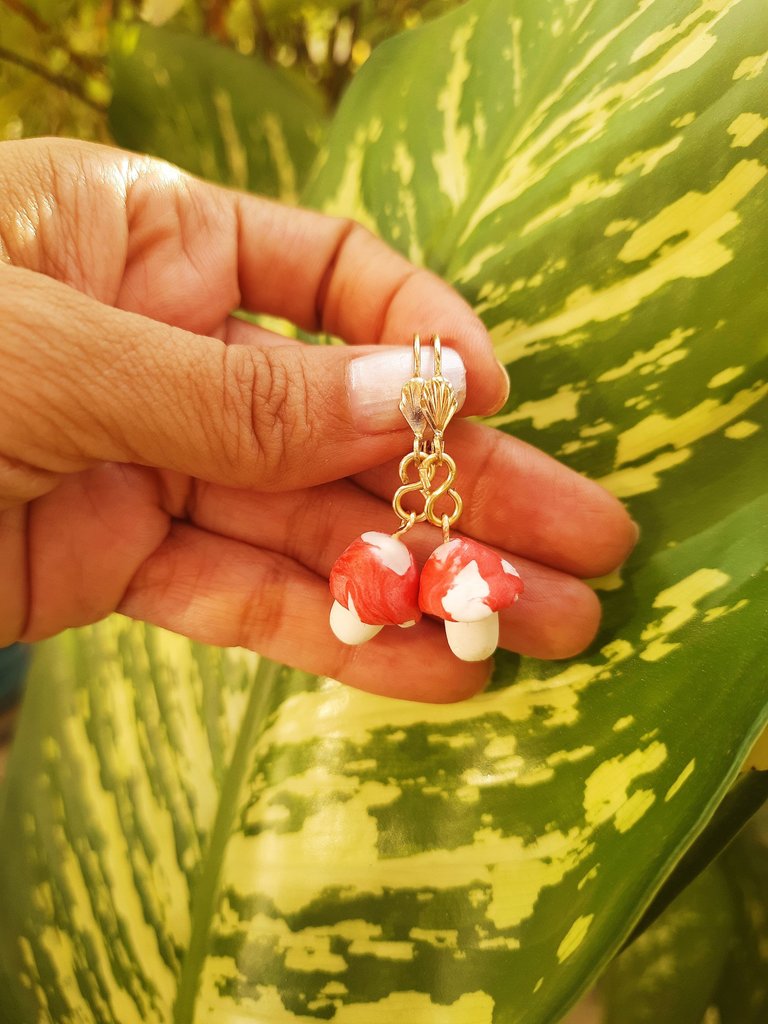
Así ha quedado listo nuestra pulsera dedicado a nuestro fanart y así ha quedado nuestro sencillo tutorial, espero que sea de su agrado, tanto como me ha gustado a mi esta pequeña y hermosa creación y mi participación al concurso de arte de @Splinterlands
Gracias por estar aquí y ser parte de mi blog y de la comunidad @jewelry 😉
So is ready our bracelet dedicated to our fanart and so is our simple tutorial, I hope you like it, as much as I liked this beautiful little creation and my participation to @Splinterlands art contest.
Thank you for being here and being part of my blog and the @jewelry community 😉.

Les invito a suscribirse a la comunidad de @Jewelry y poder así mostrar todas sus creaciones de accesorios, tanto de adultos como de niños; nos encanta ver y apoyar a todos los artesanos, manualistas y orfebres, puedes crear accesorios para damas, caballeros y niños, así que tu creatividad es el límite 😉
I invite you to subscribe to the @Jewelry community to showcase all your accessory creations for both adults and children; we love to see and support all the artisans, crafters and goldsmiths, you can create accessories for ladies, gents and kids, so your creativity is the limit 😉.
"Los accesorios tienen el poder de hacer sentir a la mujer única y especial"
Accessories have the power to make a woman feel unique and special"
Fotos principal editada con Canva.
Separadores de mi Autoría
Fotos de mi Autoría derechos reservados
Cámara: Samsung M31
Traducido con www.DeepL.com/Translator (versión gratuita)
Photos edited with Canva
Separators by me
Photos by me Author's rights reserved
Camera: Samsung M31
Translated with www.DeepL.com/Translator (free version)